Tuesday morning hack: Rename, resize and upload image, and get Markdown link
October 16, 2013, [MD]
I've written previously about a quick way of adding pictures to my blog entries. Today I was adding a picture to a pull request on Github, and thought it would be a nice thing to automatize. In the previous example, the image is just moved to my nanoc blog folder, and then gets uploaded to my server when I sync my entire blog. In this case, I wanted the image put on my server immediately, and I also wanted a bit of control over the size, and even the filename.
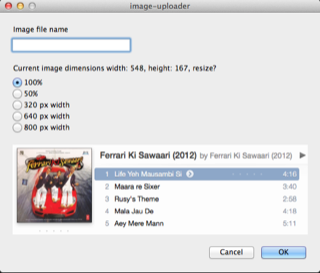
Enter Pashua, an amazing light-weight "GUI" toolkit for scripting languages, which I've used with both Researchr and my time tracker script in the past. Here's the code to generate the dialog box you see above:
config = "
*.title = image-uploader
fname.type = textfield
fname.label = Image file name
fname.name = filename
fname.tooltip = Choose from the list or enter another name

size.label = Current image dimensions width: #{width}, height: #{height}, resize?
size.type = radiobutton
size.option = 100%
size.option = 50%
size.option = 320 px width
size.option = 640 px width
size.option = 800 px width
size.default = 100%

img.type = image
img.maxwidth = 500
img.maxheight = 500
img.path = #{curfile}

cancel.type = cancelbutton
cancel.label = Cancel
cancel.tooltip = Closes this window without taking action"
The script uses sips to get the image dimensions, shows me a quick preview, let's me choose a name, and optionally resize the image, either to 50%, or to a few pre-set widths (width tends to be more important than height on the web). On clicking OK, the image is renamed and resized, and uploaded to my server. It then generates a Markdown link, and pastes it into my editor, or text field in the browser.
Quick screencast showing the script in action:
Stian Håklev October 16, 2013 Toronto, Canada comments powered by Disqus