Blogging with Nanoc: Easy workflow for embedding images
October 2, 2013, [MD]
 Part of the reason I decided to switch from WordPress to a static blogging system was that I had been writing more and more in my wiki, which runs on
 localhost and is synced to the server. I built a number of tools to speed up my workflow when editing the wiki, many based on simple Ruby-scripts that are triggered by keyboard shortcuts, and use AppleScript (through appscript-rb) to get context (which page I'm currently looking at in Chrome, etc).
 Beginning to write my blog posts as Markdown files in Sublime Text (I keep thinking I should learn Vim or EMacs, and occasionally I'll get inspired, surf people's dot files, do a tutorial -- but it never seems to stick), I not only have access to all the powerful editing features of ST, but I can also begin to add features with Ruby.
Actually, some of this might have been more elegantly done as Sublime Text plugins, but I write Ruby rather than Python, and I already have some very nice workflows that are easily adaptable in Ruby, so I'll continue in that direction for now.
Basic editing workflow
The basic workflow when creating a new blog post is
- create a new file with the appropriate file name
- fill in the metadata
- write the content
- preview to check how it looks
- compile
- sync to server
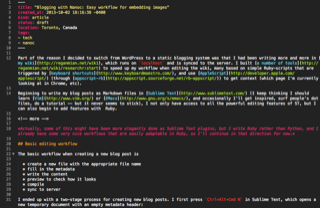
I ended up with a two-stage process for creating new blog posts. I first press Ctrl+Alt+Cmd N in Sublime Text, which opens a new temporary document with an empty metadata header:
---
title:
created_at:
kind: article
location: Toronto, Canada
tags:
---
I fill in the title, press Shft+Ctrl+Cmd S, and the file is saved with the filename derived from today's date and a slug (for example this post's filename is 2013-10-02-blogging-with-nanoc-easy-workflow-for-embedding-images), the date is also automatically filled in:
---
title: "Blogging with Nanoc: Easy workflow for embedding images"
created_at: 2013-10-02 18:16:38 -0400
kind: article
location: Toronto, Canada
tags:
- tech
- nanoc
---
 I can now begin writing the post, saving occasionally (nothing gets published until I say so). Of course, it's nice to see how the post will look, given my blog template and stylesheet, etc. It seems like overkill, but the simplest way I've found is simply to compile the entire blog (running
 nanoc) -- this only takes one or two seconds. Pressing Ctrl+Alt+Cmd P compiles the site, and then opens it in the browser (I've symlinked my output directory to my local webserver, and the page gets served through OSX's built-in Apache server).
Given that preview automatically compiles, I can do that as many times as I want until I'm happy, and then easily use a sync script to sync the output folder to my webserver to "publish" the post. (I can also commit to the GitHub repository -- I don't use this for publishing, more as a form of backup, and a way of making the "source code" of my blog publicly available).
I also added another keyboard shortcut, Cmd+Alt+Ctrl Backspace, which reads the URL of the currently open page in Chrome, and opens the corresponding Markdown file in Sublime Text (whether I was browsing the page locally, or from the server). This is great for when I am browsing old posts, and find errors (for example from the conversion from WordPress).
But what about pictures?
I was quite happy with this workflow for editing text. Sure, it would have been great to have live preview, like some of the Markdown editors, but all-in-all, it works pretty well. However, I was always wondering about what to do with pictures. I want to make it very easy to insert pictures in my blog posts, make sure that they are stored in a logical way as part of the archive, and also make it easy to "layout" the posts in a nice way. In fact, this was one of my worries of moving from WYSIWYG editing to writing in Markdown -- how can I deal with images, layout, etc.
Using WordPress, there were always a lot of clicks involved with uploading a picture, or even linking to an existing picture. The WordPress directory structure is quite weird, and half the time I would just upload the picture to my "files" directory on the server, and link to it. I would spend time resizing the pictures, and then realized that if I ever change the template of my blog (which I did when moving to Nanoc), some of the text would look awkward.
Only need two sizes, three possible positions
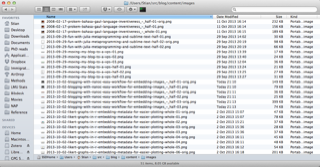
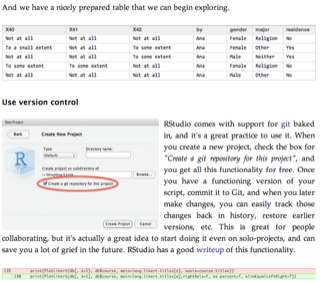 I figured out that I really only need to resize pictures into two versions, one is when I want the picture to span the entire blog, and one is when I want the picture to be on the left or the right, with the text flowing around it. I want the pictures named consistently, and stored as part of my blog archive, and I want to preserve the original non-resized picture, so that if I ever change my template, I could potentially go through and generate new resized versions of every image. (In the picture, you see examples of both.)
 I love workflows that get out of my way, and don't pop up lot's of dialogue boxes, asking me to select files and select options. I love the built-in screencapture tool in OSX (Shift+Cmd 4 to capture a selection of the screen), and for my wiki, I have a keyboard shortcut which
- grabs the most recent screenshot from the
~/Desktopfolder - resizes it if necessary
- moves it to the wiki image folder
- generates an image link
- pastes the link onto the wiki page being edited
I took this workflow, and adapted it to the blog. I can press Ctrl+Alt+Cmd C to get a picture that covers the widt of my blog (resized if necessary), or Shift Cmd+Ctrl+Alt C to have the image resized to half the width of the blog. The script also stores a copy of the original image, so theoretically I could generate different sized pictures if I ever changed blog layout in the future. (See example of my image directory on GitHub.)

Specifying image alignment in Markdown
There's no support for image alignment in the Markdown specification, but Nanoc has great support for filters, so I added my own. Dokuwiki uses the convention that [ image] will align the image to the right (with the text "filling" the empty space on the left), [image ] aligns to the left, and of course [ image ] centers the image.
Here's my (probably awkward, but works perfectly) filter that takes care of this in Nanoc:
class FixImages < Nanoc3::Filter
  identifier :fix_images
  def run(content, params={})
    resp = content.gsub(/\!\[(.*?)\]\((.+?)\)/m) do
      if $1[0..0] == ' ' && $1[-1..-1] == ' '
        align = 'float:centre; margin-left: 10px; margin-right: 10px'
      elsif $1[0..0] == ' '
        align = "float:left; margin-right: 10px"
      elsif $1[-1..-1] == ' '
        align = 'float:right; margin-left: 10px'
      else
        align = 'none'
      end
      "<img src='#{$2}' style='#{align}'>"
    end
    resp.gsub(/\[((\<img).+?)\]\((.+?)\)/m, '<a href="\3">\1</a>')
  end
end
I just add this to my Rules file
compile '/posts/*', :rep => :default do
  filter :fix_images
...And Bob is my proverbial uncle. This, together with linkify to quickly insert links, and I'm very happy with my nanoc workflow.
Here's a quick video showing the whole publishing process. Most of the code can be found in newpost.rb, and I use Keyboard Maestro to trigger the scripts.
Stian Håklev October 2, 2013 Toronto, Canada comments powered by Disqus